Mac Shell Scripts: Tips for Apple Admins
Shell scripts are indispensable for managing Mac computers. That makes shell scripting a vital skill for Mac admins.
If you're one of them, chances are you already know at least the rudiments of scripting. But for many admins, it doesn’t go much beyond that: They might know enough to copy and paste someone else’s script from StackOverflow, make a few tweaks to it, then cross their fingers and hope it works. But no matter their level of scripting expertise, they can always learn more.
Which is why we asked some of Kandji’s in-house scripting experts: What would you tell someone who wants to up their scripting game? What would you tell them about streamlining their processes or improving collaboration? What tips and tricks do you like to share with colleagues? Here’s what they told us.
Getting Ready for macOS Scripting
Before you write anything, take some time to set yourself up for success. That means making some deliberate decisions about your tools and then configuring them for maximum productivity.
Know Your Shell: Zsh vs. Bash
Many Mac scripters learned on bash, and that's what they still prefer to use. But Apple replaced bash as the default shell with zshell (zsh) way back in macOS Catalina. If you haven't made the switch yet, it's well past time you did.
There are plenty of good objective reasons to do so: Zsh's command completion is more robust than bash’s, as is its tab completion. Zsh also offers more plugins and themes, which can extend the shell’s functionality and efficiency. But the biggest and most obvious reason is that it’s now the standard on macOS.
That means including the #!/usr/bin/env zsh shebang at the top of your scripts. It also means taking the time—if you haven't already done so—to either migrate older bash scripts that might still be sitting in your IT team’s GitHub repo or just to get rid of them if they’re no longer needed.
No matter how long you've been using zsh, take time out every so often to review or learn something new in your shell’s syntax. Cheat sheets can be a huge help. Subscribing to Armin Briegel’s indispensable Scripting OS X newsletter would also be smart.
Find the Right Shell Script Editor
Unless you’re an extreme minimalist or old-school traditionalist, chances are you’ll edit your scripts in some kind of scripting-optimized GUI editor or integrated development environment (IDE). Popular options include Visual Studio Code, BBEdit, Nova, Sublime Text, and CodeRunner.
A good IDE or other editor makes script-writing more approachable, even enjoyable, by providing (among other benefits):
Syntax highlighting: Makes it easier to read and visualize your script, by visually distinguishing between different script elements such as comments, functions, and strings. Some IDEs will highlight errors such as missing closed parentheses. Some will also highlight the source of error messages when you try to run your script.
Auto-formatting: Automatically fixes things like spacing and tab indents, following rules you set. This can save you tons of typing time; rather than manually formatting each line of code, you can simply press a button or hotkey to have the editor automatically adjust the formatting for you. It also gives your scripts a consistent look and feel.
Theming: Most IDEs support themes, which let you select the mix of colors and fonts used in the editor. You can then create your own default theme, which will be used on all new scripts, and build new ones (if you wish) for different kinds of projects. This can help not only with readability but also with making it easier on your eyes when you’re staring at a script for hours.
Good IDEs and editors also come within robust ecosystems of plugins and integrations, which extend their functionality and make coding more efficient. Some of the most popular IDE plugins are static code analysis tools, which can automagically format code and also detect and help you correct mistakes before they happen; in the process, they can also teach you how to code better, showing you where there are issues and linking to resources that’ll help you understand why your code is being called out.
But be warned: Such tools are generally written specifically for one shell or another. For example, one of the most popular scripting plugins, ShellCheck, analyses your scripts, letting you know where errors could occur or where you've left orphaned variables that aren't going to be used. But it’s built for bash. (There are semi-reliable ways to make it work with zsh, too.)
Integrating with a version-control system such as Git or Github is vital for an IDE or script editor. It’s the easiest way for an IT team to collaborate on and share scripts. It also helps you to see the changes you’ve made to your own scripts.
Writing the Script
Once you’ve got your environment and tools set up, you’re ready to start scripting. This can be a horrifying moment for new or even veteran scripters. But there are ways to make it less intimidating.
Great Scripters Copy
One thing smart scripters agree on: They almost never start from scratch. More often than not, they start by copying and pasting from another script—their own or someone else’s—that does something close to what they want their new script to do and then customizing it as needed. (In case you didn’t already know, Kandji maintains a GitHub repo of publicly-available scripts. Feel free to use or repurpose anything you find there.)
One side benefit of this: Copying and then editing a script someone else wrote is a great way to learn new ways to write your own.
Mac Shell Commands: Output Statements
This is not to say there aren't some potential pitfalls in copying and pasting scripts. Sometimes the formatting—such as straight vs. curly quotes—doesn’t copy over properly (which could break the script); copying from PDFs is especially prone to error. Also, how do you know that there isn’t a lot of extraneous stuff in the source script that either doesn't apply to your situation or may be counterproductive or even risky?
For that reason, it’s smart to modify copied scripts—or those you write from scratch—to give you feedback about what they're doing. One way to do that: Insert print statements between steps in your scripts. That way, you can track which value has been assigned to variable X or what the output is from function Y.
To be even more methodical, add an exit 0 statement right after the first print statement, to make the script stop at that point. Once you’re sure of the expected output, you can move the exit statement further down in the script and proceed. Once you’re sure everything works, you can remove all those print and exit statements.
One alternative to larding your script with print commands: Temporarily insert the set -x command as the second line of the script, after the shebang. That turns on xtrace mode (aka verbose mode), which means the shell will print out each command that it executes, along with the expanded arguments and any other relevant information.
Follow a Template for Your Shell Scripts
It helps to follow a consistent, logical structure in all the scripts you write. Doing so keeps your scripts organized and readable and gives you a reliable place to start when writing a brand-new script or reformatting a copied one. For example, at Kandji our scripts are structured in sections:
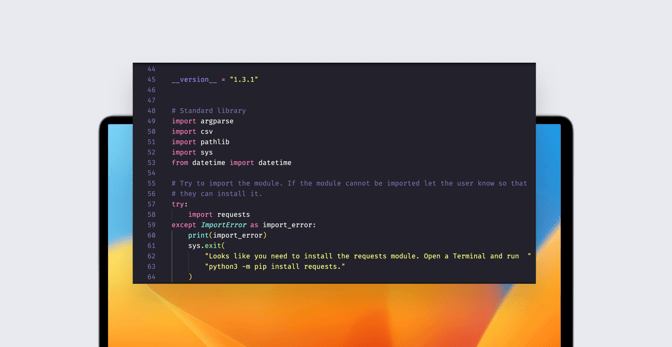
Header: We start with comments containing information about each script: The names of the creators and contributors; the dates the script was created and then updated; the version(s) of macOS on which the script has been tested; a description of what the script does and why the script was created; a changelog (if the script is long or the changes significant); the license information governing the use of the script, including copyright; the version number.
Variables: This is where we declare variables that retain constant values throughout the script, as opposed to local variables that are declared and then altered within functions.
Functions: Functions may not be strictly necessary, but they can make your script more concise: You define a function once, then call it repeatedly throughout the script, without repeating the whole thing each time. Functions also make your code more reusable: A function you define in one script can be reused in others (see below).
Main logic: This is the logical core of your script. For scripts that are to be shared, it’s helpful to add a “modify at your own risk” comment here, indicating that users should not alter this section of the script unless they really know what they are doing.
Think About Reuse and Readability
Making your scripts readable is useful not only for debugging but also for reuse: If you wrote a script a year or more ago, you may forget why you did things the way you did. But if you write them to be readable, it’ll be a lot easier to decode your own thinking.
One way to enhance readability: Comment liberally. Coding classes always preach the virtues of commenting, but many scripters still neglect it. They really shouldn’t. Commenting not only makes the script more readable for future you, but also for anyone else who might work on the script at a later date; it’s clearly vital for IT teams that write scripts collaboratively. Not sure about the best commenting practices? Google’s own shell-scripting style guide is a great place to start.
You should also think about building scripts out of reusable components. If you come up with (or copy) a function that you really like for, say, parsing a .csv file, remember it or stash it away somewhere you can find it easily.
Be consistent about how you name your variables, both within a given script and from project to project. Scripts are much easier to read if your eyes and brain are accustomed to a given name style.
The specific naming format you choose is a personal matter. Some scripters like to use all caps for constant variables and lowercase for local ones. Some like camel case (camelCase), while others prefer snake case with underscores (snake_case).
Whatever your personal preference, be consistent. And whatever style you adopt, if a variable name is not self-descriptive, add a descriptive comment above the variable declaration.
And while we’re on the topic of names, one last bit of advice from Kandji’s scripters: Take some care with the names of your scripts, too. Give them meaningful ones, so you don’t have to guess what they do. And, again, be consistent about the case. Whether you’re a snake case or camel case person, don’t flip between the two. Pick your favorite and stick to it.
About Kandji
Kandji is the Apple device management and security platform that empowers secure and productive global work. With Kandji, Apple devices transform themselves into enterprise-ready endpoints, with all the right apps, settings, and security systems in place. Through advanced automation and thoughtful experiences, we’re bringing much-needed harmony to the way IT, InfoSec, and Apple device users work today and tomorrow.