Guide for Apple IT: Content Caching in macOS Big Sur
Content caching is a powerful tool that speeds up software installation on Apple devices on a local network. At WWDC 2020, Apple announced a few exciting changes that will make content caching even more powerful on macOS Big Sur. In this guide, we’re going to do a deep dive into what content caching is, how it’s changing, and how you can accomplish simple and advanced configurations for it.
Here’s a brief overview of what we’ll cover:
-
What’s Content Caching?
-
What’s Changing in Big Sur?
-
How to Set Up Content Caching on Mac
What’s Content Caching?
Content caching is a macOS service that speeds up software installation on Mac computers, iOS devices, iPadOS devices, and Apple TV devices. This is accomplished by storing local copies of previously downloaded content on a Mac computer’s content cache. Connected Apple devices can then retrieve the content without having to retrieve copies of the content from outside of the LAN.
Content caching can optionally apply to iCloud data as well. For instance, if users have downloaded data from their iCloud account, it will be cached so local Mac, iPhone, iPad, and Apple TV devices can download it – without having to retrieve copies of the content from outside of the LAN. Content caching can extend beyond iCloud or App downloads as well, including Mac apps, books, software updates, Xcode components, and more.
Network Requirements for Content Caching on Mac
In Apple’s support documentation, they strongly recommend that you set up content caching on a Mac computer that uses a single-wired Ethernet connection as its only form of connection to the network. Content caching can still work if your Mac is using a Wi-Fi connection instead, but you will probably notice slower performance than if you used Ethernet alone.
You can only use content caching on networks with publicly routable IP addresses or on networks with a NAT environment for the content cache and all devices. Apple devices running on iOS 7 or later and OS X 10.8.2 or later will, without any configuration necessary, automatically contact content caches within their proximity.
Content caching is limited to a specific subnet by default. However, you can configure it to provide content caching for all of your local network’s subnets that share a public IP address or for any combination of subnets of publicly accessible IP addresses. In the former case, even a network with multiple subnets (if they share the same public IP address) can use a single content cache.
Content Types Supported by Content Caching on Mac
Not all types of content can be caches, but macOS has built-in support for most major types of software that you’ll use in the workplace. These include:
-
iOS updates, macOS Updates, and Internet Recovery images (this requires macOS 10.13.5 or later)
-
Xcode downloadable components, such as simulators (requires Xcode 10.2 or later)
-
iCloud data caching (available for photos and documents)
-
iOS and Mac App Store apps and app updates
-
Apple Books content and GarageBand downloadable content
A full list of supported content types can be found here.
How Does Content Caching Work?
When content caching is enabled on your Mac, a copy will be made of all content that’s downloaded on networked devices. These devices are called “clients,” and the space where the copies are stored is called a “content cache.”
The default location for a content cache is the boot volume of your Mac. An alternate location can be chosen, and you can also specify the amount of space that should be used for the content cache. Once the content cache exceeds this specified amount of space, it will delete content that hasn’t been used recently to make room for the most recent request.
If a client on your company network downloads a macOS update, then a copy of the update will be made and stored in the content cache. This initial download of the update will likely be slower than future downloads that leverage content caching. When the next client on the network initiates a download of the same update, the update will be retrieved from the content cache rather than downloaded via the internet from the App Store.
Retrieving content from a local network is often faster than using the internet. Because these clients do not need to retrieve copies of the update from outside of the LAN, they can retrieve the update much faster.
You can also use multiple content caches. If your network uses multiple content caches, they can be configured as “peers.” Peers can communicate and share cached software with one another. For instance, if a client requests content that isn’t available on a content cache, its peers will be checked for the content. If the content isn’t located on any peers, the content will be downloaded from a parent, from Apple, or from the internet. This depends on your configuration settings.
What’s Changing in Big Sur?
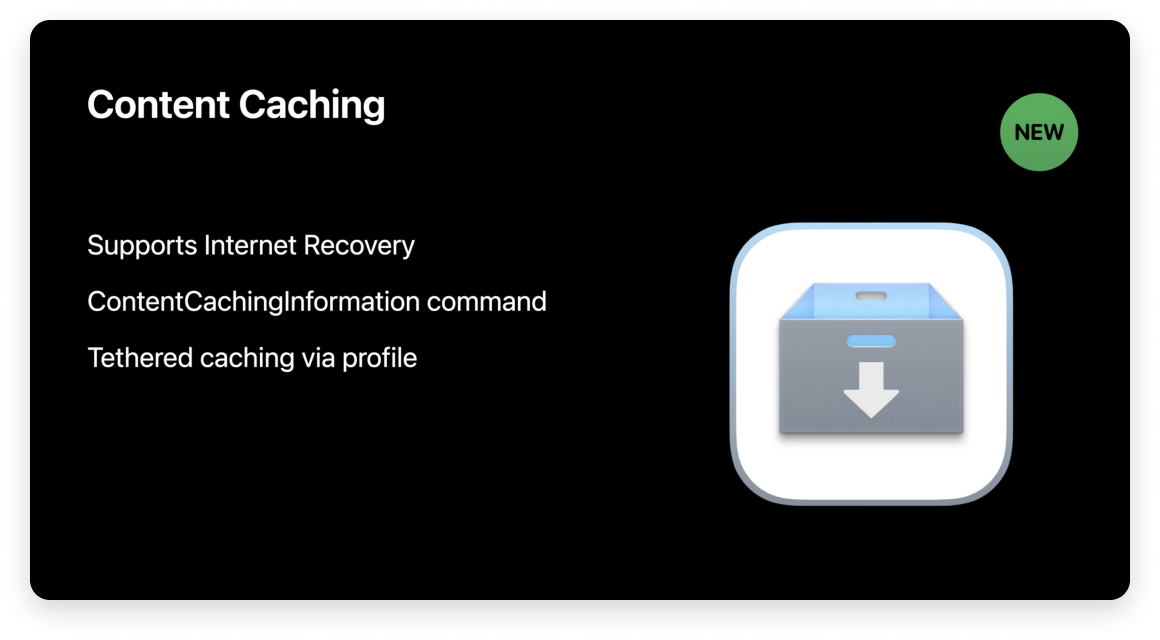
Image source: developer.apple.com
A few major changes have come to content caching on macOS Big Sur. We’ll take a look at them below:
-
More Data Types are Now Supported: Content caching on macOS Big Sur has been expanded to support a wider range of data types. Now, there are over two dozen data types supported, including apps, books, iCloud content, GarageBand music, software updates, Xcode components, internet recovery, and plenty more.
-
New Internet Recovery Feature: The new internet recovery feature will cache the recovery image so Mac computers can be restored on your network quickly. However, this feature doesn’t include the initial boot image.
-
MDM Commands for Caching Metrics: ActivityMonitor can display important performance metrics, but in macOS Big Sur, those metrics will also be accessible via the new
ContentCachingInformationMDM command. This command lets IT see if content caching is in use, gauge how it’s being used, and help users download apps faster.
How to Set Up Content Caching on Mac
In this section, we’re going to cover how you can enable, configure, and organize content caching on your network. Before we being, it’s important to note that content caching will only work if your Mac is awake.
To prevent your Mac from entering sleep mode, access your device’s Power Adapter settings (Apple menu > System Preferences > Battery > Power Adapter) and select the “Prevent computer from sleeping automatically when the display is off” checkbox. This option can also be easily configured via an MDM solution such as Kandji, using the Energy Saver payload.
Turn on Content Caching
To turn on content caching for your Mac, follow these steps:
-
Open the Content Cache Settings: Go to the Apple menu > System Preferences > Sharing > Content Caching.
-
Enable Content Caching: In the service list on the left, click the Content Caching checkbox. In a moment, the content caching indicator will turn green. This indicates that content caching is active. Yellow indicates that content caching is temporarily unavailable, and light grey indicates that it’s off.
-
Configure Content Caching: Access the Cache pop-up menu, and then determine which type of content you want cached:
-
-
All Content: This option stores software updates, apps downloaded from Apple, and iCloud content in the cache.
-
Only Shared Content: This option stores software updates and apps downloaded from Apple in the cache.
-
Only iCloud Content: This option stores iCloud content, such as photos and documents, in the cache.
-
-
Restart Clients: To ensure that client devices automatically discover the content cache, restart them. Otherwise, it may take them a while before they discover the cache.
If you want to turn off content caching, simply uncheck the box that we checked in step two. You can also use the Terminal app to view content caching logs and statistics.
Set a Volume for Content Caching
As we mentioned earlier, by default, content is cached on the startup volume of your Mac. If you have additional volumes available on your Mac, you can specify where you’d like the content to be cached. To do this:
-
Open the Content Cache Settings: Go to the Apple menu > System Preferences > Sharing > Content Caching.
-
Open Cache Location Settings: Click Options > Click the Edit button next to Cache Location.
-
Select Storage Volume: Select the storage volume that you’d like to use, and then click Move. This will temporarily stop content caching until the existing cache has moved to the new location.
Setting Up More Complicated Content Caching Workflows
If you’re using a large network, optimizing your content caching workflow can get complicated. This may involve specifying clients, using multiple content caches, and creating a hierarchy of parent and child caches.
Here’s a brief overview of what that entails:
-
Setting up Clients: If you’re managing a lot of devices, it’s important that a content cache only receives requests from nearby devices. You can specify which content caches are best positioned to serve clients based on a range of IP addresses. You can find more information about this in Apple’s content caching client documentation.
-
Setting up Peers: If you’re using multiple content caches for your network, then you’re using peers. You can configure what type of information peers share and specify a range for IP addresses optimally connected to peers optimally. You can find more information about this in Apple’s content caching peer documentation.
-
Setting up Parents: You can organize multiple content caches, or peers, into a hierarchy by specifying “parent” and “children” peers. Using this organization, parents will share content with their children. You can find more information about this in Apple’s content caching parent documentation.
Setting Advanced Configuration Parameters
For more control over your setup, you can use Terminal commands or use the MDM payload to fine-tune content caching with advanced parameters. We’ll take a look at both of these methods here.
Use Terminal to Set Advanced Configuration Parameters
You configure content caching from the command line by using the AssetCacheManagerUtil utility. This utility can also be useful if you’re using a headless or remote Mac, or if you need to configure content caching on another Mac, which you can log into via SSH.
Using most AssetCacheManagerUtil commands requires root privileges, and they must be used with the sudo command. Commands include the ability to:
-
Turn content caching on or off.
-
Display content cache settings or status.
-
Determine if content caching is active or can be turned on.
-
Import an existing cache from another computer.
-
Move an existing cache to another computer.
-
Reload the content cache settings.
-
Remove all cached iCloud content, shared content, or all content.
To see a complete list of these actions with their commands, see Apple’s documentation.
Configure Content Caching with MDM
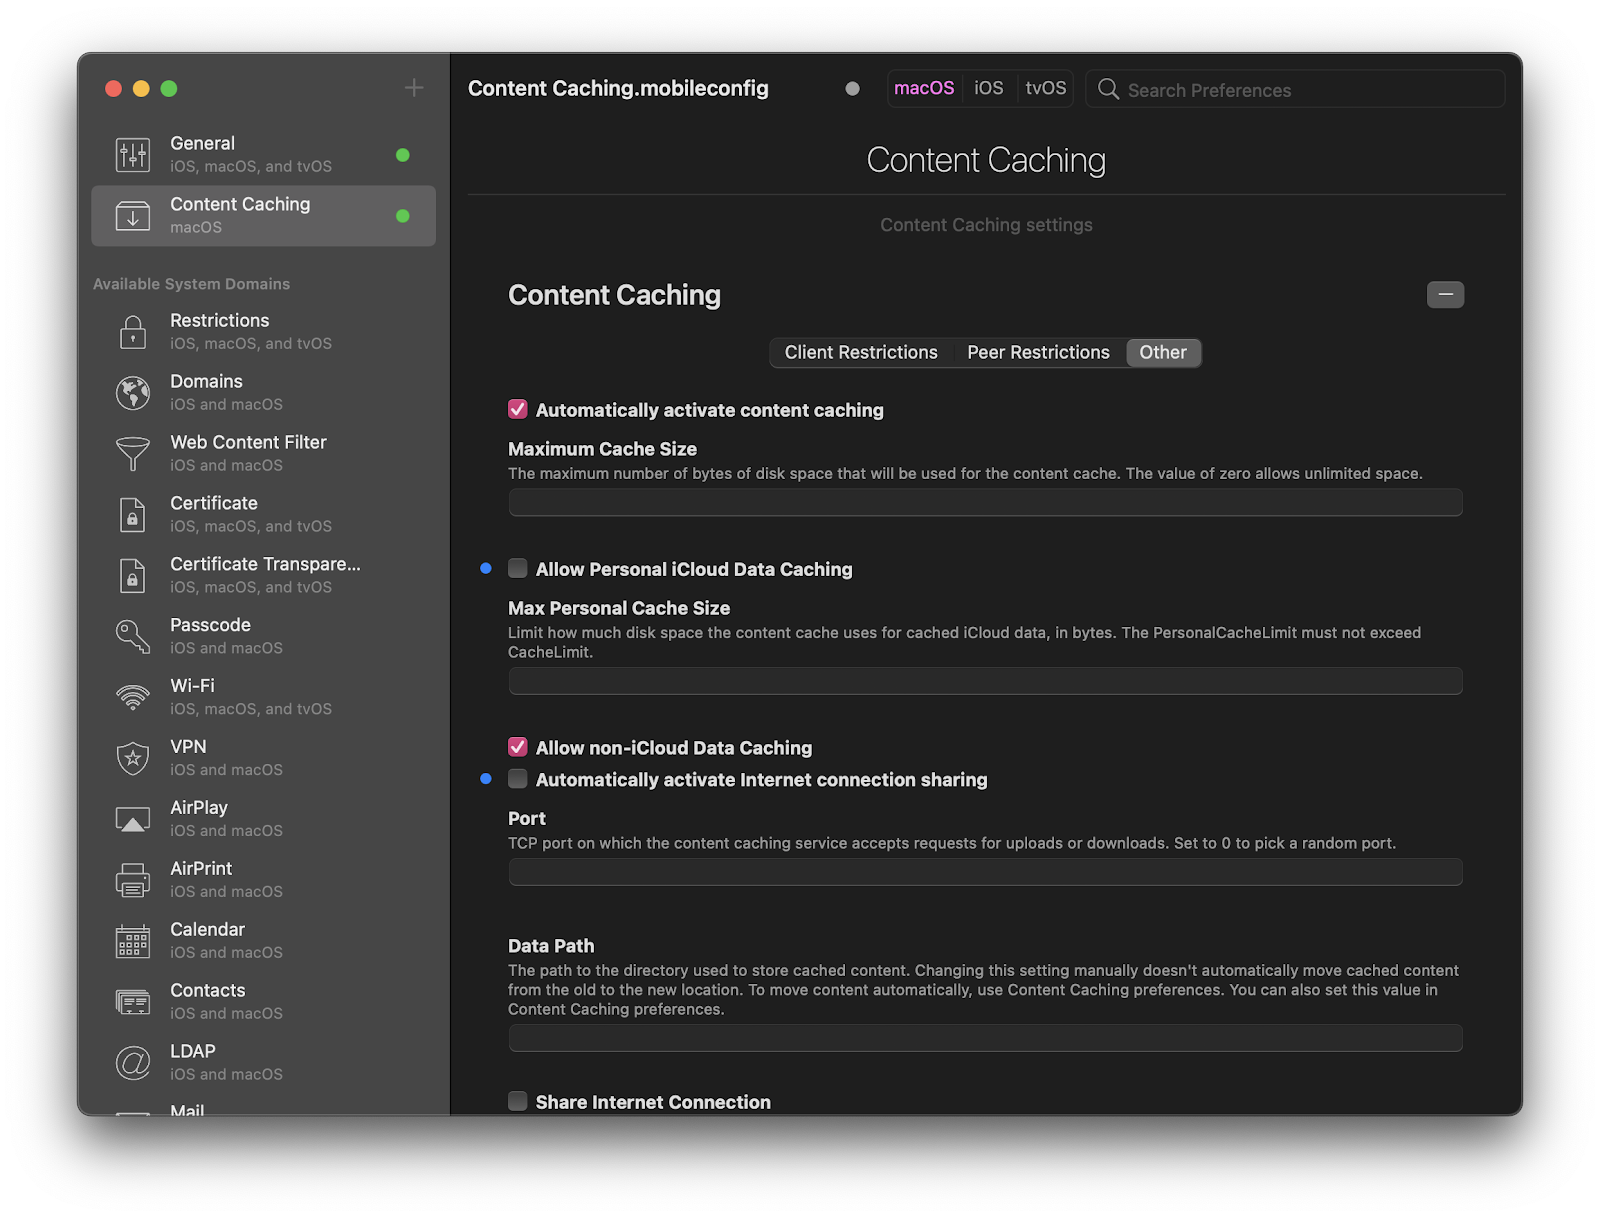
You can configure the standard and advanced content cache settings by deploying a configuration profile that includes the com.apple.AssetCache.managed profile payload.
-
Download a tool such as iMazing Profile editor to allows you to easily configure the configuration profile using a GUI-based tool.
-
Find and configure the Content Caching payload as required for your network, see Apple's documentation for specific information on which options to configure for your network, as these can vary. Generally, these options are very similar to the options available in the macOS content caching configuration interface.
Use Terminal to Discover Content Caches on Your Network
When configuring or troubleshooting content caching on your network, it may be useful to understand what content caches a client sees on the network. Thankfully, Apple has included a CLI tool in macOS that allows you to do just that.
Open terminal on a client Mac, a Mac other than the content caching device, and run the following command:
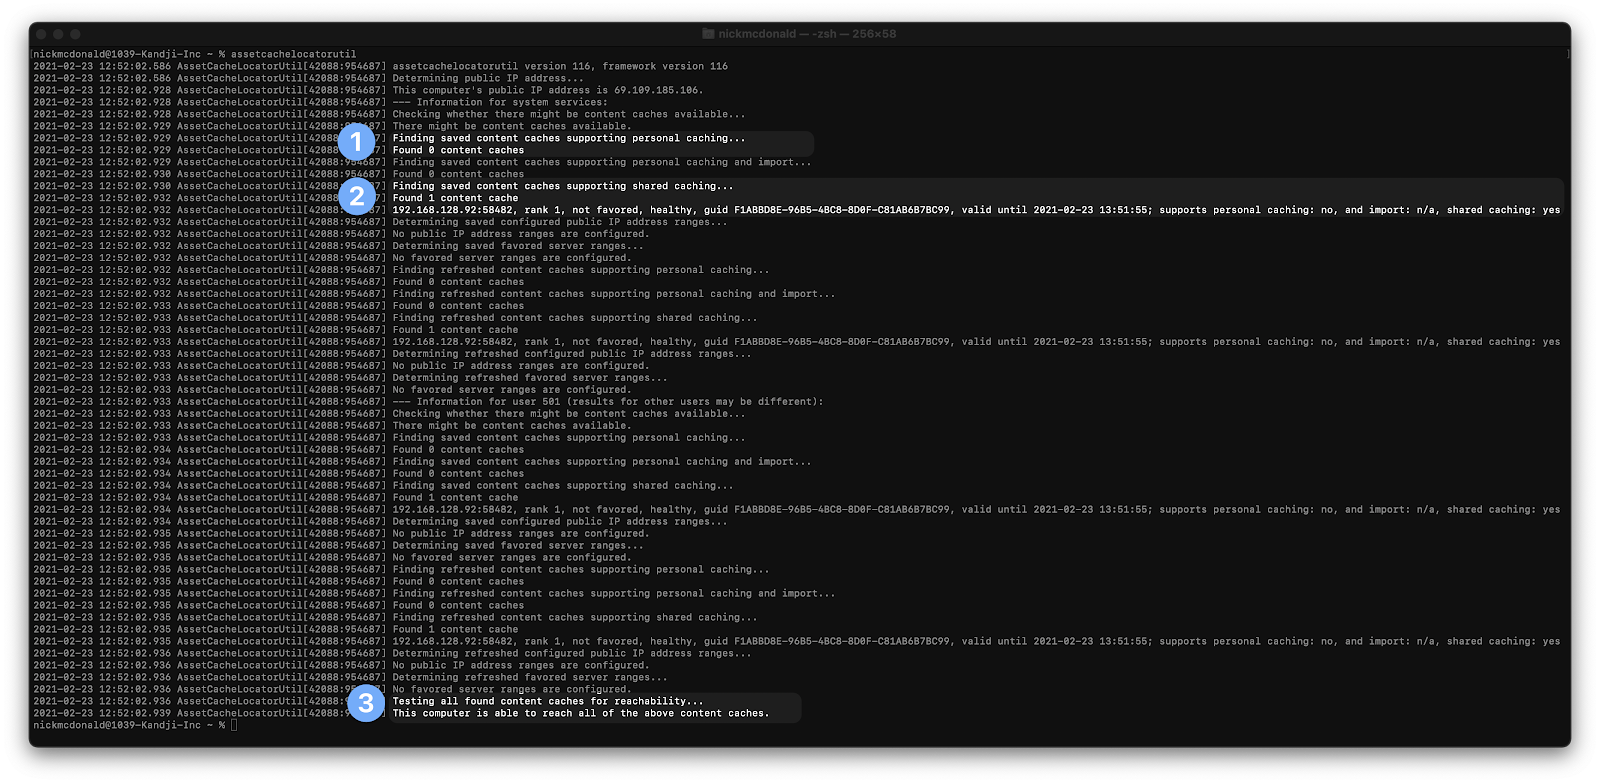
assetcachelocatorutil
Note: You may need to restart the client Mac prior to running this command.
In your terminal window, you will see output similar to the following showing you any content caches discovered by the client on the network, and the various content types they are configured to support, as well as if the client Mac is able to reach the content caches.
-
In this highlighted section, we can see the number of content caches on the network that support “Personal caching” (iCloud Content)
-
In this highlighted section, we can see the number of content caches on the network that support “Shared caching” (Other shared content)
-
In this highlighted section, we can see the number of content caches that the macOS Client was able to reach on the network.
With innovation and iteration at the core of everything we do, we’re constantly building solutions to give you more of what you need and improve upon features you already love. With Kandji, you can be confident that your Apple fleet is in safe and secure hands from deployment to retirement.
