Guide for Apple IT: Auto Advance for Mac
Auto Advance is a great feature that lets IT administrators set up Apple TV devices at scale – And now this feature is coming to Mac. At the World Wide Developer Conference (WWDC) 2020, Apple announced the new Auto Advance for Mac capability, opening up a new way to set up Mac computers at scale.
This has big implications for device management, which we’ll explore in this guide along with configuration walkthroughs, common Auto Advance use cases, and some of the latest information we have on Auto Advance for Mac.
Here’s an overview of what we’ll cover:
- What’s Auto Advance?
- Using Auto Advance for tvOS
- Using Auto Advance for Mac
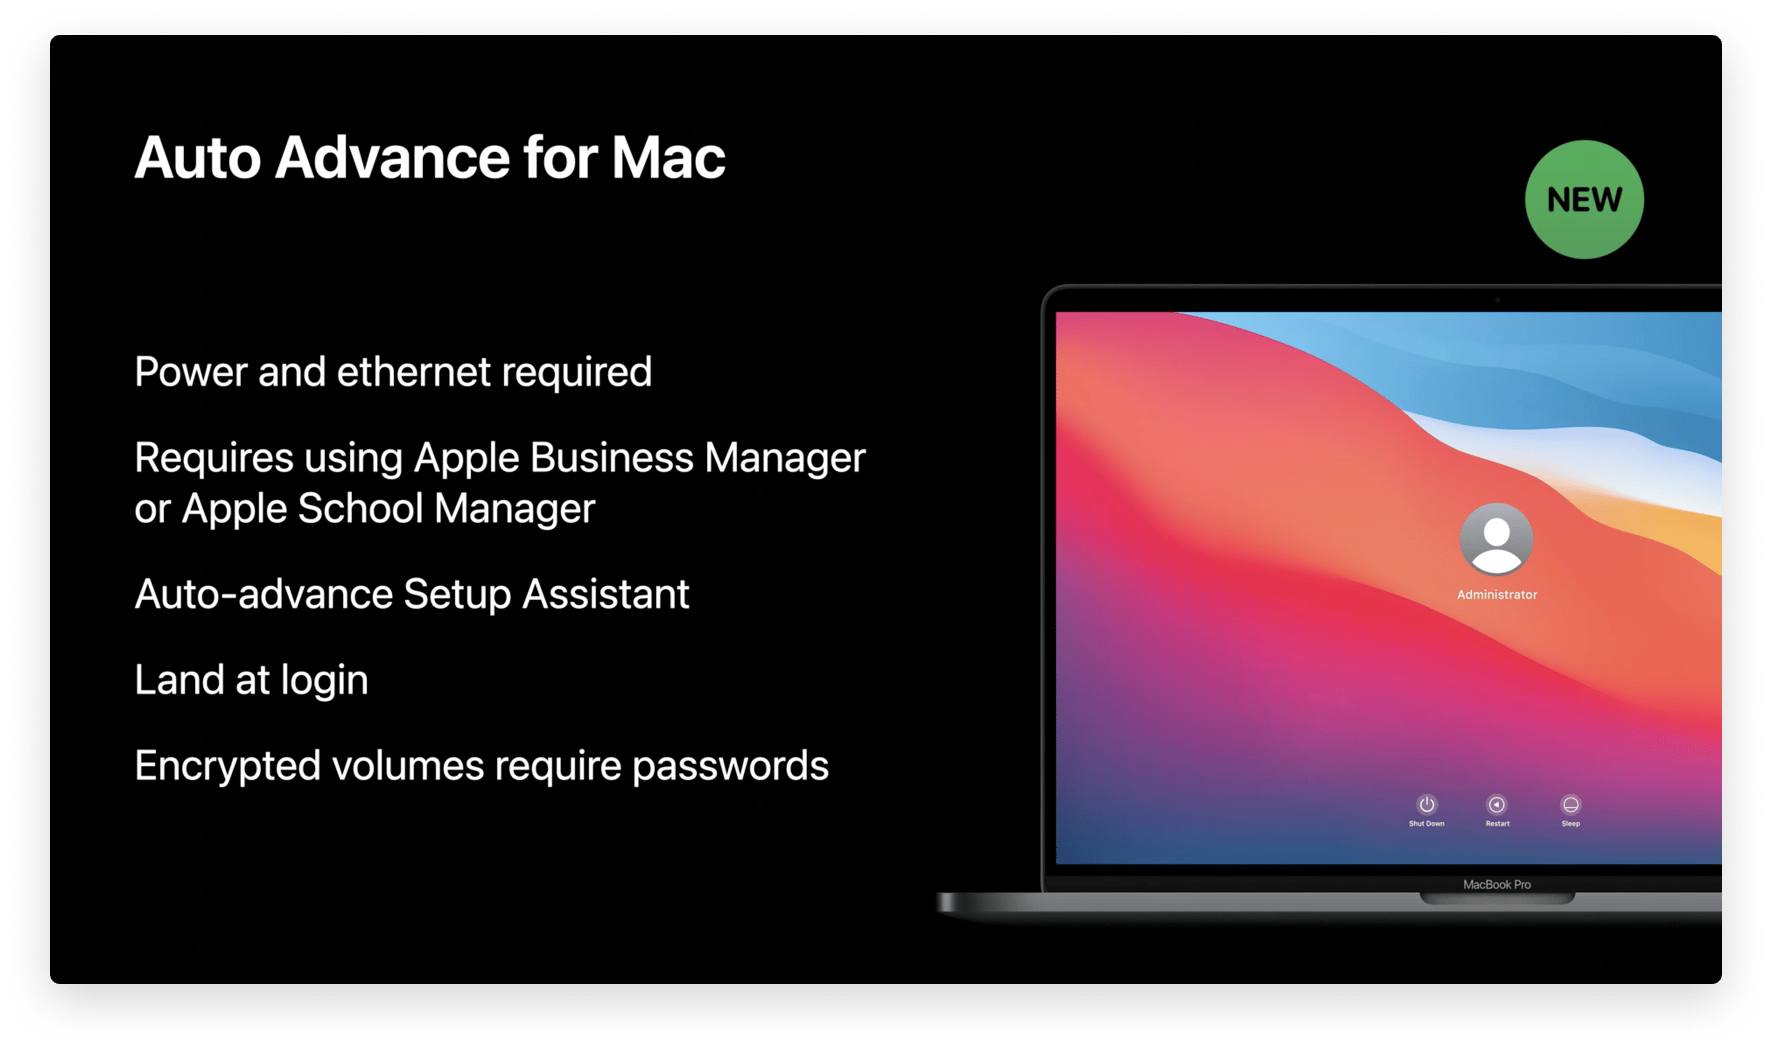
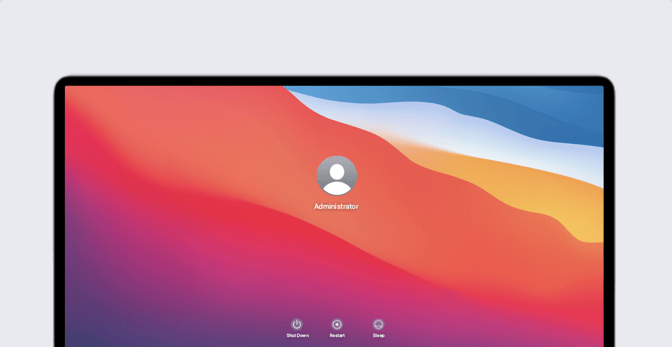
Image source: developer.apple.com
What’s Auto Advance?
Apple introduced the Auto Advance capability to make setting up Apple TV devices – and now Mac computers – at scale faster. In a nutshell, Auto Advance is an enrollment setting available for Apple devices that leverage Automated Device Enrollment. (For a deep dive into Automated Device Enrollment, you can read our guide to device enrollment.)
This feature saves a lot of time for IT teams and users. Rather than manually proceeding through Setup Assistant for every new device, with Auto Advance enabled, IT administrators can automatically skip the setup process, so employees can use the device faster.
If your business-owned Apple devices appear in Apple Business Manager and are managed in your MDM (mobile device management) solution, you can configure the Auto Advance enrollment option. This makes it easy to tailor an enrollment workflow to your needs, such as locking Apple TV devices into settings for digital signage or presentation.
As for Auto Advance for Mac, once enabled, setting up a Mac is as easy as plugging it into power and ethernet, and then turning it on. That means users will land on the login window faster – and the device will still be managed according to your business’ needs.
This is a great option with IT administrators who manage a lab environment, want to skip unnecessary setup screens, or simply want a more streamlined setup process. We’ll take a closer look at use cases and configuring Auto Advance for Mac and Apple TV over the next couple of sections.
Using Auto Advance for tvOS
Any tvOS device that’s enrolled through Apple Business Manager and assigned to a compatible MDM server can be enabled for Auto Advance. Leveraging MDM and Apple’s Automated Device Enrollment method, Auto Advance-enabled tvOS devices will complete activation with Apple, retrieve the DEP profile and enroll instantly upon activation.
The entire Setup Assistant is skipped, so you won’t even have to choose a language or pair a tvOS remote. This lets users achieve a seamless enrollment workflow with Apple TV devices that are reset or just came out of the box. Upon activation and enrollment, the user will land right on the home screen. This lets them use the device as soon as possible.
In this section, we’re going to cover common use cases for tvOS, and then we’ll walk you through the process of configuring Auto Advance for your tvOS devices.
Using Auto Advance for tvOS
We already covered how Apple TV devices with Auto Advance just need ethernet and power, and then they set themselves up on their own. Now, we’re going to cover two major use cases for this feature: digital signage and presentation devices.
Achieving Digital Signage with Auto Advance
If you intend to use your Apple TV for digital signage, you can configure it from an MDM solution like Kandji. This is a simple process – you just have to plug in your Apple TV and get your MDM to set it up and lock it into single-app mode.
Single App Mode mode will ensure that you can display your digital signage without interruption. In single-app mode, the Apple TV cannot be used for other services, like video streaming. Even if you lose power, perform a system update, or restart the device, the TV will boot up and immediately go back to the app you’ve chosen. That means your Apple TV will only display the signage you intend, and it cannot be used for other purposes unless you authorize it.
Creating Presentation Devices with Auto Advance
You can also leverage Auto Advance to create presentation devices. This is useful if you’re setting up an Apple TV in your conference room and want to limit its functionality to just presenting materials. This will let users wirelessly display presentation materials from their Apple devices while minimizing common technical issues.
With Auto Advance, you can have your MDM solution automatically set up an Apple TV and launch it in conference mode. Just like with the single app mode for digital signage, the appeal of launching in conference room mode is the lack of disruption. Even if your device reboots, updates, or if power is lost, the Apple TV will remain locked into conference mode.
Now that Apple announced Auto Advance for Mac, there are a few exciting new use cases that IT administrators can take advantage of. We’re going to cover those later in this article. For now, let’s take a quick look at how you can configure Auto Advance for tvOS with your MDM solution.
How to Configure Auto Advance for tvOS
Using our MDM solution Kandji, you can easily set up Auto Advance for your company-owned Apple TV devices. In this section, we’re going to lay out the steps on how to add or modify an auto-enroll configuration that supports Auto Advance. Of course, this process will look different depending on which MDM solution you’re using and if it supports this functionality to begin with.
Prerequisites for Auto Advance
Before we get started, let’s cover a few prerequisites. Keep in mind that Apple TV devices can only be managed if they’re assigned to the Kandji MDM server inside your instance of Apple Business Manager account. If your Apple TV devices aren’t available in your Apple Business Manager account, then getting that done is your first step.
To do this, you’ll need to use a Mac with the latest version of Apple Configurator running on macOS High Sierra or later. You’ll also need a display connected to your Apple TV, with both your Mac and Apple TV on the same wifi or ethernet network.
Next, you’ll need to follow the steps listed in our support article. Keep in mind that enrollment will only work while your Apple TV is at the Setup Assistant – If your device has already been set up, then you’ll need to reset it.
Once you’re done, your Apple TV devices will appear in Apple Business Manager, and you’ll be able to assign them to Kandji. Now, we can move on to enabling Auto Advance via MDM.
How to Configure Auto Advance for Apple TV
Once you’ve gotten the prerequisites out of the way, we can get started. Kandji’s Auto Advance option will let your Apple TV devices skip all of the Setup Assistant steps that they would normally have to advance through manually.
To take advantage of this feature, just follow these steps:
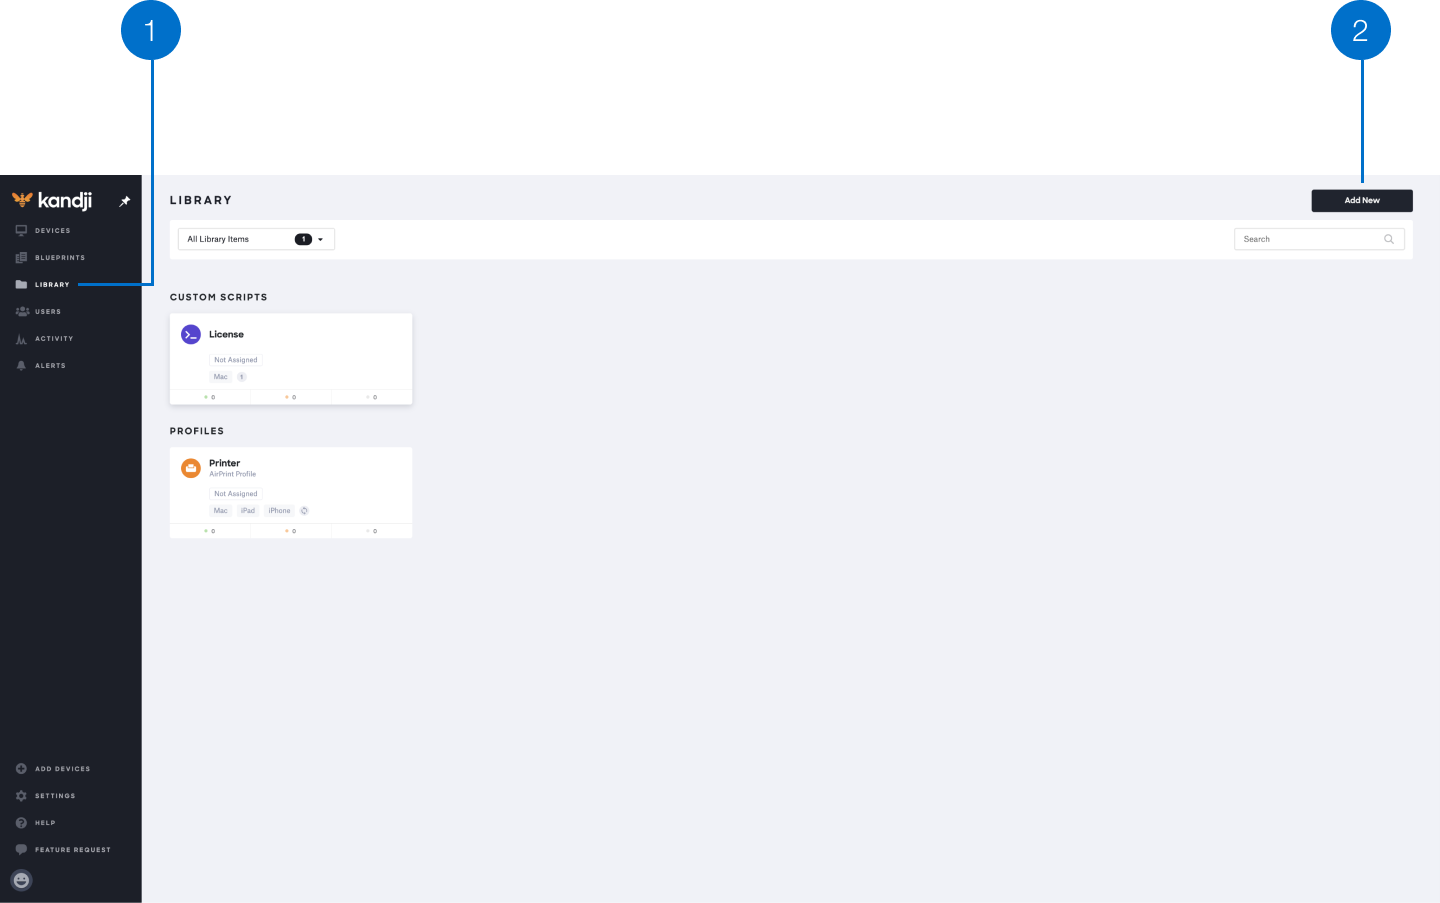
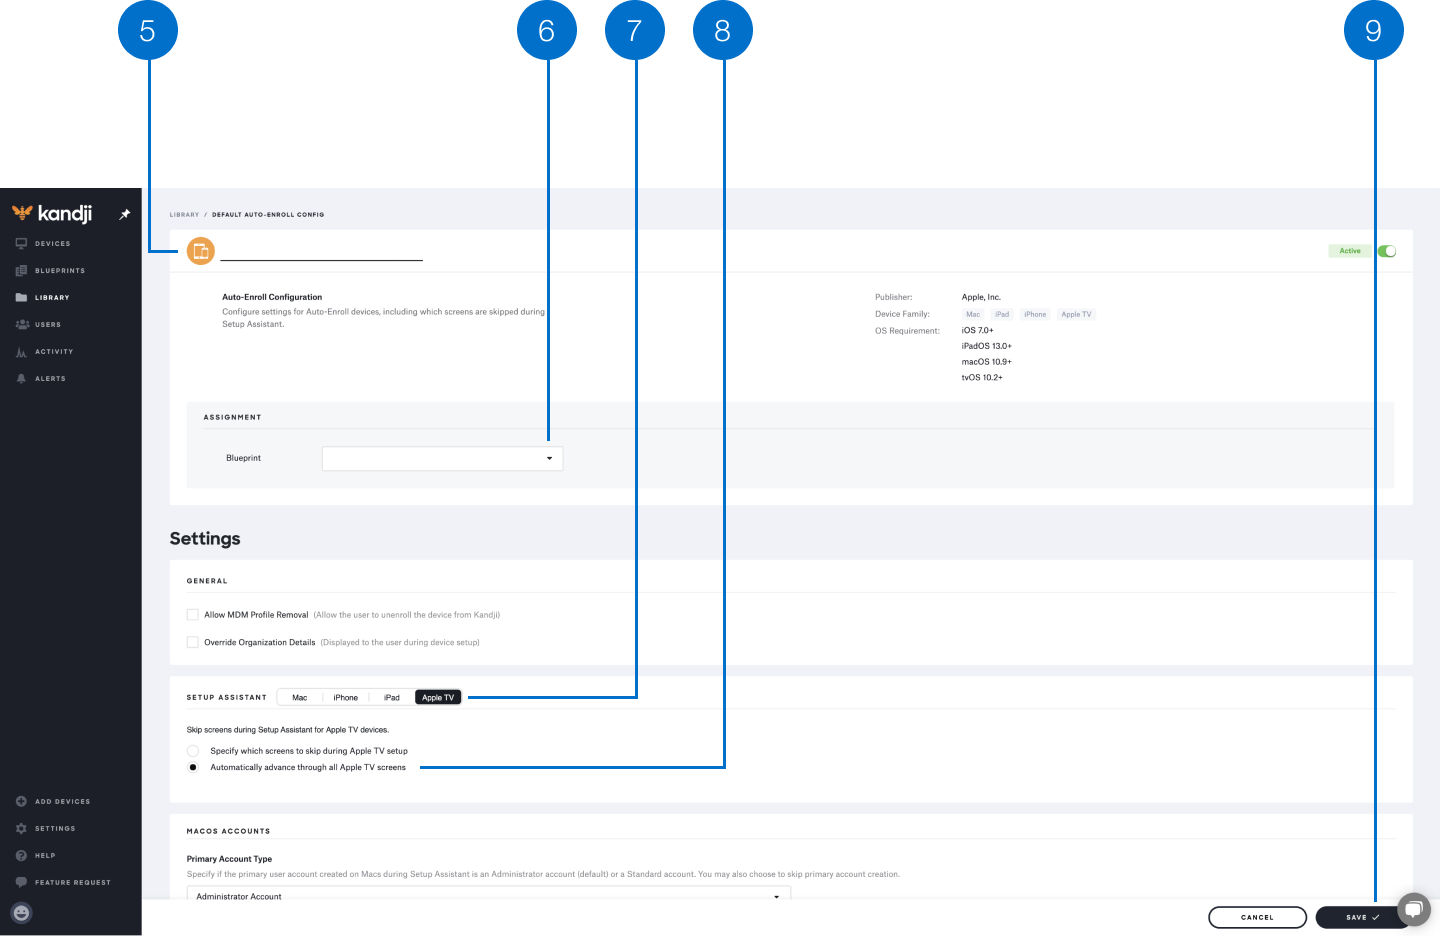
1. Open the Kandji Web App and select Library. It’s located in the left-hand navigation bar.
2. Click the “Add New” button in the upper right-hand corner, as pictured below.
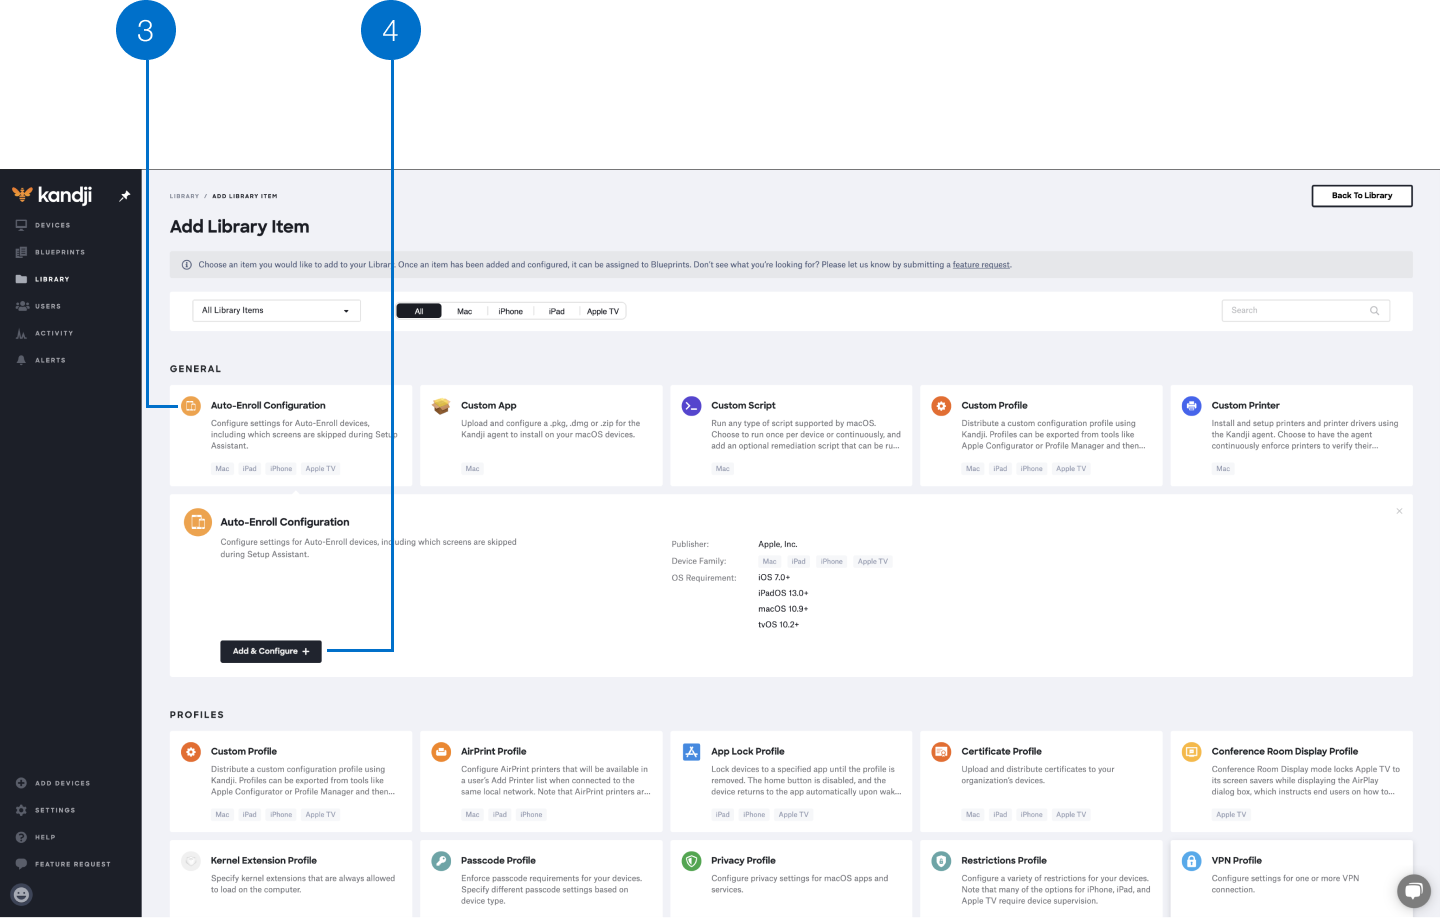
3. Click the Auto-Enroll Configuration option.
4. Click Add & Configure.
5. Name your Auto-Enroll Configuration.
6. Assign it to the Blueprint(s) of your choice.
7. Click the Apple TV setup assistant option.
8. Click Automatically advance through all Apple TV screens.
9. Click Save in the lower right-hand corner.
Using Auto Advance for Mac
With macOS Big Sur, IT administrators can now take advantage of Auto Advance for Mac computers. Any company-owned Mac computer that appears in Apple Business Manager and is assigned to your MDM solution can now be enabled for Auto Advance.
Just like with Apple TV, once the Mac starts, it will automatically skip all setup screens and bring users directly to the login window. Using Auto Advance for Mac, you can also customize the setup process to meet your business’ specific needs.
Also similar to Apple TV, Auto Advance (Mac) works in tandem with Automated Device Enrollment. However, for Mac computers, you’ll need an ethernet connection and to plug into power. Since Auto Advance for Mac is still a new feature, people are still figuring out what it can be used for. In this section, we’re going to explore a few use cases that you may find helpful.
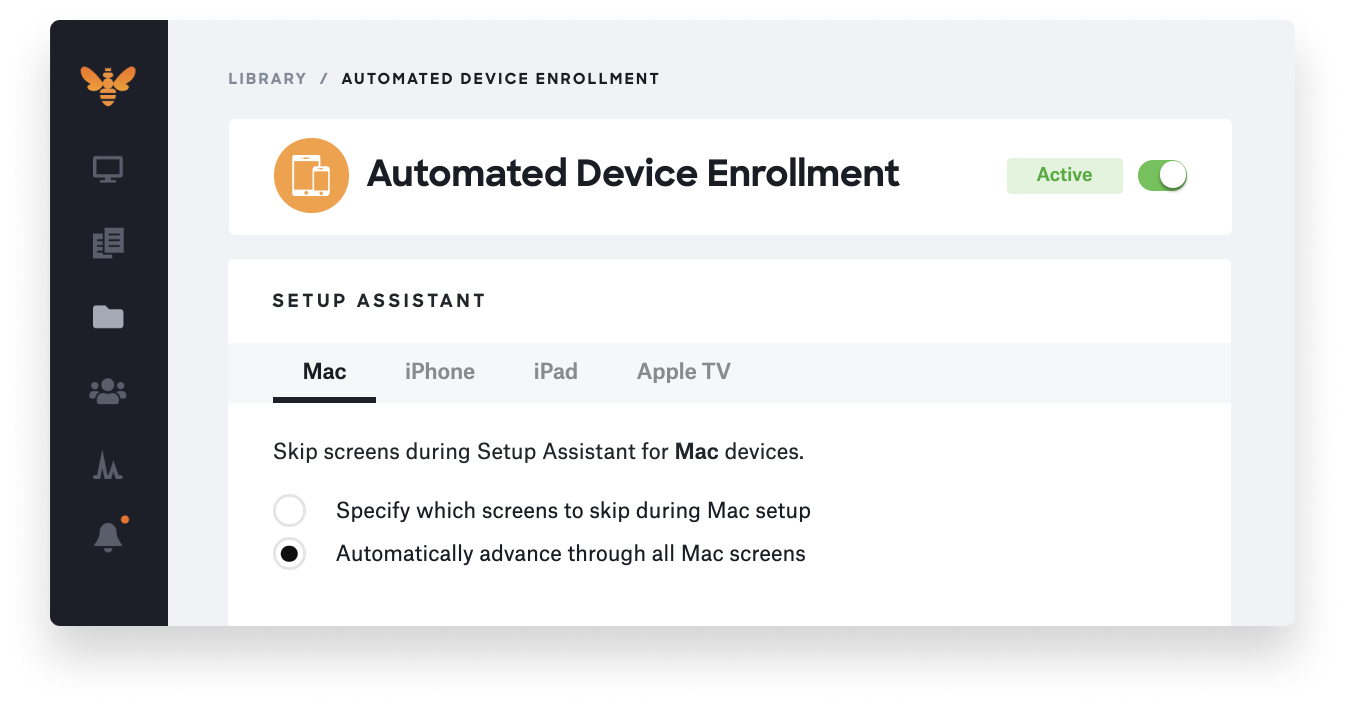
Kandji supports Auto Advance through Automated Device Enrollment options, as shown:
How to Use Auto Advance (Mac)
To use Auto Advance for Mac, your device must be available in Apple Business Manager, and it must be managed assigned to your MDM server. While only a power cord and ethernet connection are required to begin the process, your organization’s network must support DHCP.
Once Auto Advance is accomplished, users will land directly at the login window, so they can begin working immediately. There are plenty of other use cases that IT can achieve with Auto Advance (Mac). We’ll look at a couple of them now:
Setting up a Lab and Binding to Active Directory
Leveraging Auto Advance, Mac labs and binding to Active Directory (AD) will be much easier to achieve. For instance, the current workflow, without using Auto Advance (Mac), looks like this:
- You would have a DEP profile for Mac, optimized to skip as many setup screens as possible.
- Your MDM solution pushes a bind profile to bind Mac to your AD domain.
- And then IT still has to manually interact with the computer to go through remaining Setup Assistant screens – for every single Mac in the lab.
This can become incredibly tedious, and it isn’t a good use of your IT team’s time. Leveraging Auto Advance, Mac lab and binding workflows could be greatly simplified:
- You would use the same DEP profile for Mac, but it would have a new Auto Advance key in it.
- Once the Mac computers are plugged into ethernet and power, they fully skip Setup Assistant and receive the bind profile from your MDM solution.
- Users will land on the login window. And that’s it.
In this case, IT wouldn’t have to physically interact with every device by clicking through Setup Assistant. They simply have to plug the devices into ethernet and power, and then it’s good to go. This saves a considerable amount of time, and the Mac computers still get provisioned and managed according to your organization’s standards.
Streamlined Zoom Room Onboarding
Just like in the last example, using Auto Advance (Mac) for Zoom room onboarding can save IT a significant amount of time. Here’s what the workflow looks like:
- The DEP profile would pre-create an Auto Admin account.
- Using Kandji, our MDM solution, you can use a Blueprint to automatically push down Zoom Room via Auto Apps. (Read more about this in our guide to Auto Apps.)
- Once you log into the account, Zoom Rooms is ready to be registered.
There are plenty of other ways that IT can use Auto Advance (Mac) to streamline processes. Such as deploying headless Content Caching devices. There are countless applications for this in any workflow where IT would normally have to physically interact with a lot of computers, such as if you manually set up Mac computers before handing them off to employees.
The Kandji MDM solution already makes using Auto Advance for tvOS a breeze, and our team is excited to build support for the latest Apple features, like Auto Advance for Mac. With powerful features like zero-touch deployment, one-click compliance, and offline remediation, Kandji lets you get the most out of your Apple fleet, including everything you need to enroll, configure, and secure your devices.
