Guide for Apple IT: Introduction to Mac Shell Scripts
With computers, there are usually multiple ways to perform a given task. On Mac, the most obvious and most common way is through the graphical user interface (GUI) using a keyboard, mouse, or trackpad. But smart Mac admins know that anything you can do in the GUI you can usually also do from the command-line interface (CLI).
The CLI on macOS is typically accessed via the Terminal application. For instance, instead of switching to the Finder, navigating to /Users/Shared, and clicking File > New Folder, you could open Terminal and enter the command mkdir -p /Users/Shared/NewFolderName.
While entering commands one at a time at the command line is handy, what if you find yourself entering the same commands over and over again? Or what if you need to run the same commands on multiple computers? That’s where scripting—more specifically, Mac shell scripting—comes in handy.
In this tutorial, we’re going to focus on the basics that IT teams need to know about Mac shell scripts, to help them perform actions on multiple devices in their organizations using a Mac device management solution. This guide is not intended to be a general-purpose guide to shell scripting for all Mac users. We'll cover:
- What Mac shell scripts are;
- How Mac shell scripts are created;
- What you can accomplish with Mac shell scripts;
- The commands and other components Mac shell scripts can contain;
- How to test Mac shell scripts to be sure they work;
- How to deploy Mac shell scripts via MDM; and
- How Mac shell scripts can help with device management.
What Is a Mac Shell Script?
A script for a computer is just a series of instructions (commands) for the computer to execute and, as such, is a great way to automate repetitive tasks. Scripts are scalable. Instead of spending 30 minutes per computer performing the same task over and over again, you can write a script once and then deploy it to tens, hundreds, or thousands of computers.
Mac shell scripts in particular are those that use the command set built into the Unix shell built into macOS and accessible via Terminal.
Because scripts can be delivered to user devices via a device management solution (such as Kandji), they’re indispensable tools for IT teams. They let you do complicated things quickly, accurately, and easily:
- Quickly because using scripts in conjunction with mobile device management can automate tedious tasks, letting you do something like accessing a computer program on 100 company devices with zero clicks instead of 100.
- Accurately because a good script will execute a defined action the same way every time, instead of trusting an occasionally fumble-fingered admin to complete the task manually, which can lead to errors, inconsistency, and confusion.
- Easily because you can accomplish a really complicated and nuanced task with a series of simple scripts that break it down into smaller pieces.
How to Create a Shell Script in macOS
Shell scripts are just plain text files, so you can compose them in many different programs. A simple text editor such as TextEdit on the Mac will work in a pinch but is not ideal for script composition. There are third-party solutions that make shell scripting easier by doing things like syntax highlighting (adding colors for better contrast when reading your code), flagging errors, suggesting solutions, autocompletion, code formatting, or running the script without leaving the editor. Among the more popular (and free) options: BBedit, VScode, Vim, and Sublime Text.
All of these apps have great features, and one isn’t necessarily better than another—it's best to try them out and find the one you prefer. But whether you’re a scripting newbie or an advanced administrator, we recommend using a dedicated script editor. (One thing to note: When you're saving a script file from a standard text editor, you may need to change its file extension from the default .txt to .sh or .zsh.)
After settling on an editor, the next thing to consider is the shell you’re going to use. The shell is the command-line interpreter, or language, that will process the commands of the script. Historically, the default shell for macOS was bash. But with the introduction of macOS Catalina Apple changed the default from the bash shell to zsh (zshell). Both are part of the Bourne family of shells; working with one or the other shouldn't be a limitation when writing a shell script. Just keep in mind that by default, current versions of macOS will interpret a script using zshell.
Once you've built a script, it's good practice to store it in a place like GitHub, so you can access it from any device and share it with others.
What Are Terminal Commands?
Those two tools—an editor and a shell—are all you need to start assembling Mac shell scripts. The most basic building blocks of such scripts are Unix commands that are built into the shell. Among the most common and useful shell commands you should be familiar with:
- cat: read and display the content of one or more files.
- cd: change the directory you’re working in.
- chmod: modify file or folder permissions.
- chown: modify file or folder ownership.
- cp: copy files.
- curl: a tool for sending data to or receiving data from a web server—think sending API requests to your MDM.
- defaults: read software preference files.
- echo: return the result of a command to standard output.
- grep: search a file for a given pattern.
- killall: stop a running process or app.
- ls: list the contents of a directory.
- man: view the manual page for a command.
- mkdir: create a new directory or folder.
- mv: move one or more files or directories.
- /usr/libexec/PlistBuddy: modify software preference files.
- pwd: see the directory you’re currently working in.
- rm: delete files.
- rmdir: delete a directory.
(Be very careful with those last two: Their effects are permanent!)
The "manual" for most scripting commands can be found with the man command—for example, man defaults. If you enter that into Terminal, you’ll get a description of what the defaults command does and the options you can use with it. Not all commands have a manual page; some incorporate their own help option that works similarly to man.
Reading the man pages for simple commands is a great way to learn how to script and to find out what is possible with a given command. It can also be a good place to start if you're unsure about what to do next; you can use the terms mentioned in the man page to do further research on the internet.
The Building Blocks of Bash Scripts
Beyond these and other commands, scripts can contain several other elements:
Options
Additional flags can often be used to modify a command's behavior. For instance, the ls command will list the contents of a directory in column view while ls -l will list them in long-form (allowing you to see the permissions and ownership of files within the directory). The -v flag will often cause a command to run in verbose mode, providing additional output that can be handy for troubleshooting.
Some commands require elevated permissions to run; standard users can't use them. To run a command with elevated permissions, you put sudo—short for "super-user do"—at the beginning of the command and then enter an admin user’s password when prompted. (Note: You'll be prompted to enter that password directly in Terminal itself, not in a separate window as you would if, for example, you were changing something in System Settings.)
If the command is making a change or applying something to the entire computer, sudo will be needed; if it is just impacting the user’s account and nothing beyond that, it isn't.
Tip: If you run a command that requires admin permissions but you forget to put sudo first, you can just enter sudo !! ("bang bang," in script-ese) to tell the shell to run the previously entered command with sudo.
Variables
Variables are named placeholders or containers that refer to a specific value. When you type in the variable name, the system treats it as if you’ve typed in the value it refers to. You can assign variables to numbers (integers), letters (strings), filenames, or other data types.
Variables make it easier to write scripts that use specific chunks of data—even if that data is changing. Take, for example, usernames. You could assign the output of a command that gets the name of the currently logged-in user to the variable username. When the script executes on a given device, that variable will then refer to the appropriate username.
Assigning a value to a variable is easy: variable_name=value. Capitalization does not matter, but be consistent throughout the script. The variable name and value can be just about whatever you want, such as: x=1 or VAR1="hello". Note that zsh (like other Bourne shells) does not use spaces before or after the equal sign while assigning variables:
- Incorrect:
x = 1 - Correct:
x=1
(This is something that a text editor like BBedit can help you correct before even running the script.) However, you can use spaces in the values assigned to a variable by using quotes: x="Number one".
Conditionals
Conditionals are if/then statements that set conditions and, if they’re met, perform an action: If it’s 6:00 am, then say "Good morning." The syntax of if/then statements looks like this:
if <condition>; then<do something>fi
To break that down:
- Start with
ifand immediately follow it with its conditions. - Use a semicolon to separate the
ifcondition and begin thethencommand, which will only take place if the if condition is true. - Finally, close the if/then statement with
fi ("if" spelled backward).
So, for example:
# Check to see if 5 is greater than or equal to 4.
if [ 5 -ge 4 ]; then# Print the statement below to the Terminal window.echo "That number is greater than or equal to 4"fi
Here, we’re checking to see if one number (5) is greater than or equal to (-ge) another number (4). If it is, the then command will be executed, displaying (echo) a message: That number is greater than or equal to 4. (Imagine what you could do if you swapped out that 5 for a variable.)
You can extend conditionals by adding an else section after the then clause, to specify an alternative action in the event that the if condition isn’t met. For more complex conditional logic, you can use elif (else if) to efficiently add further conditions.
What Can Mac Shell Scripts Do?
Instead of composing scripts from scratch, you can find a working script that does something close to what you want and then adapt it to your particular needs; this is how many, if not most, experienced scripters actually get things done. Finding working scripts from trusted sources or ones you’ve written in the past and then modifying them for your current purposes can save time and help you understand how scripts work.
So, for example, here are a few scripts that you could adapt for some typical IT tasks in macOS. Want to figure out how they work? Check the man pages!
Demote user to standard Permissions
# Get the currently logged in username.loggedInUser=$(/usr/sbin/scutil <<< "show State:/Users/ConsoleUser" | awk '/Name :/ && ! /loginwindow/ {print $3}')
# Use the dseditgroup command to remove the user from the admin group.
/usr/sbin/dseditgroup -o edit -d "$loggedInUser" -t user admin
Find App Store category
#!/bin/bash

# Use a for loop to iterate over each Application in the Applications directory to find the App Store category.
# If the app says “null” it’s not from the App Store

for app in /Applications/*.app; do
   AppCategory=$(/usr/bin/mdls -name kMDItemAppStoreCategory "$app" | awk '{print $3}' | tr -d '"')
   /bin/echo $(/usr/bin/basename $app) has a category of: "$AppCategory"
done
Quit a specific application
# Use the killall binary to quit the App Store app/usr/bin/killall "App Store"
Enable the Guest User
# Use the PlistBuddy command to update the loginwindow preference file, enabling the guest user login./usr/libexec/PlistBuddy -c “set GuestEnabled 0”
"/Library/Preferences/com.apple.loginwindow.plist"/bin/echo "Guest User enabled"
Notice that some of these scripts include the echo command, which outputs messages as scripts run. However, these messages should not be confused with comments. Good scripters and coders insert comments in their scripts and code to clarify what different bits are doing. This is handy not only for your own future reference but also for others in your team who may want to reuse or revise your script. You add comments by preceding them with the hash sign (#) (also known as an octothorpe).
Here’s a more elaborate script that uses the Kandji Agent to reboot a Mac computer if the last reboot time was more than a week.
#!/bin/bash

#get the current date
currentDate=$(/bin/date +%s)

#get the last boot date
bootDate=$(/usr/sbin/sysctl -n kern.boottime | /usr/bin/awk -F'[ ,]' '{print $4}')

#how many seconds in 7 days
week=604800

#echo $currentDate
#echo $bootDate
#echo $week

#get current uptime by subtracting the bootDate from the currentDate; result will be returned in seconds.
uptime=$(( currentDate - bootDate ))

#echo $uptime
if [ $uptime -ge $week ]; then

#echo "You have been booted for longer than a week"
   sudo kandji reboot --delaySeconds 60
fi
Notice the use of variables (currentDate, bootDate, week) and conditionals (using the Kandji reboot command based on a time condition). Note also the lines beginning # echo. As explained further below, these can be used to test a script.
How to Test Your Script
Once you’ve got a script that you think will do what you want, the next step is to test it. Admins who deploy scripts to other users’ computers have an extra obligation to do so—there is no undo button for bash commands and scripts that contain them. That testing can be broken down into several phases.
We recommend you start by testing pieces of the script first, to make sure the individual parts work and return the results you expect, then test the script as a whole. More specifically, as you’re developing a script, test its subcomponents as you go, so you know that each section of the script is doing what you want.
If, for example, a section of your code is supposed to generate a value for a variable called username, then after you’ve developed that portion of the script you can insert the line echo "$username" to print the contents of the variable and then execute the script. (To make a script file executable, use the chmod command.) If you see the expected output, that section would appear to be functioning correctly, and you can either remove the echo line or comment it out by inserting a hash sign (#) at the beginning and then move on to the next section.
Once you have the whole thing assembled, you should run your shell script on a non-production computer or virtual machine. You may need to test on multiple versions of macOS as well, to ensure that your scripts can be reliably deployed to all users in your fleet. If necessary, you may need a modified version of a script to account for different versions of macOS to make sure it will work as intended.
Once those local tests are good to go, upload the script to your mobile device management (MDM) solution and deploy it to test devices—typically, those are either dedicated test machines enrolled in your MDM or those that are used by the IT team only. This assumes, however, that your device management solution can, in fact, deploy scripts.
Using Mac Shell Scripts with an MDM Solution
You can deploy scripts via your MDM solution only if that solution installs some kind of macOS agent on user computers as part of the enrollment process; deploying scripts is not a part of Apple’s MDM framework, so an extra software agent is required to download and run scripts locally. (Kandji includes such an agent, but some solutions do not.)
(Note for Kandji users: The Kandji Agent runs all scripts and commands as root. See our support article for more information. The Kandji Agent, while primarily hands-off after being installed, also has some commands that can be used on their own, or added into a script.)
If your device management solution doesn’t deploy scripts, there is an alternative: package your script and deploy that. Packages (PKG) are a great way to install applications and resources in macOS, and you can add pre- or post-install scripts to the package that will perform actions before or after the main package content runs.
This is quite useful, especially when you are deploying an app that requires a task to be completed—applying a license, writing custom settings to a .plist file, or changing computer settings—before or after the app is installed. Note, however, that troubleshooting such scripts can be difficult, as feedback from them is limited.
LaunchDaemons and LaunchAgents can also be used to run scripts, and they can be automated. Want to make sure that the Trash is emptied every time a user logs out or logs in? You can do that with a script and LaunchAgent.
You can’t run scripts on iOS, iPadOS, and tvOS, because while they support the MDM framework, they can’t operate resident agents the way macOS can. That said, you can apply profiles that configure and customize the OS on these operating systems, and you can use scripts and the MDM’s API on the admin side to automate tasks against these device types using the MDM framework. If the MDM supports it, you may also be able to customize configuration profiles with the use of global variables.
Your work is not done once your script is deployed. IT teams need to ensure that deployed scripts continue to work efficiently, especially as the environment evolves and your requirements change. We recommend the following:
- Test your script with each new major release of macOS to ensure they continue to work.
- Polish and improve your script as you gain new knowledge.
- Think about ways to make your scripts more modular so that you can reuse sections of them in other scripts as needed. (Comments are especially helpful here.)
- Rely on available APIs to further automate tasks.
- Use version control to keep track of changes you make to your scripts.
Scripting and Device Management
One big reason MDM is so great is that it allows you to automate processes, such as installing software or enforcing FileVault. Scripting used in conjunction with an MDM solution such as Kandji can take your device management to the next level. With scripts, you can use automation for tasks like clearing a DNS cache, renaming a computer, cleaning up before a software install, adding licenses, or applying settings after an app install.
Maybe your organization is moving away from a particular piece of software and you need to make sure it is removed from all of your computers. A script written one time and deployed via MDM can accomplish that on all of your devices in a matter of minutes. Or maybe your organization is adopting new software that requires a license to be entered; that can be done via script, too, so you don’t have to run around to all of your computers manually entering numbers or asking your end users to do so.
Scripts are also useful for managing settings that aren’t part of the MDM spec. For example, you can use that defaults command we mentioned above to change computer or software settings.
Combining the power of scripts with an MDM solution like Kandji empowers you to realize your full device-management potential. Which makes scripting an essential skill for any Apple admin.
For more information on scripting and learning how to do it, check out some of these resources:
- About shell scripts in Terminal on Mac
- Command Line Primer
- Shell Script Basics
- Scripting OS X
- The #scripting channel on Mac Admins Slack.
- Regular Expressions 101
Editor's Note: This blog post was extensively revised January 10, 2024.
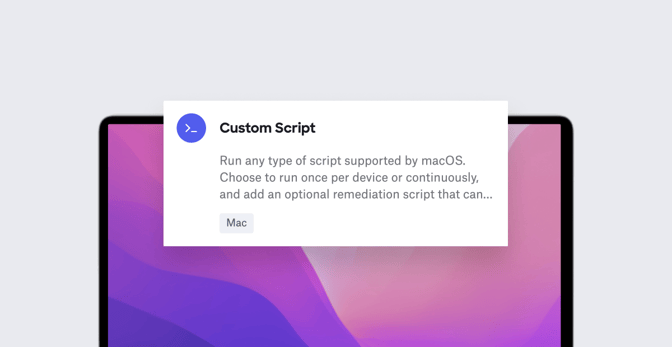
About Kandji
Whether you’re deploying a custom script feature or specifying pre-and post-install behaviors for custom apps, Kandji makes it easy to incorporate scripting into your management workflows. With powerful and time-saving features such as zero-touch deployment, one-click compliance templates, and plenty more, Kandji has everything you need to bring your Apple fleet into the modern workplace.